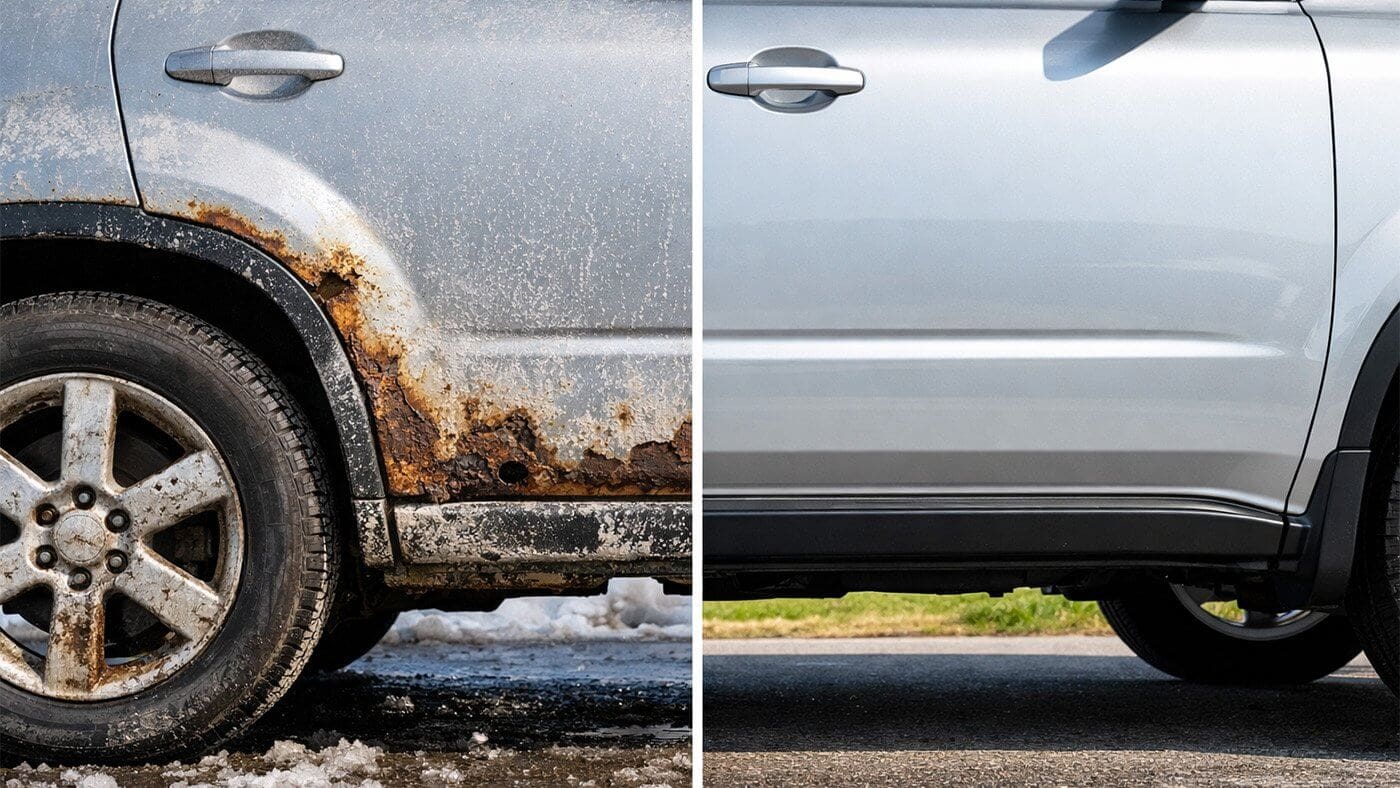

If you've ever spent twenty minutes in a drive-through car wash line and driven away with streaks on the windows and salt still caked in the wheel wells, you already know the problem. Automatic car washes are convenient, but they're often not as thorough — and in a lot of cases, the spinning brushes leave fine scratches in your clear coat that dull the finish over time.
Learning how to wash your car at home takes a little more effort the first time, but the result is genuinely better. You control what touches the paint, you can get to the spots that matter — door jambs, the undercarriage, the rocker panels — and you end up with a cleaner car that's also better protected. Once you have the right setup and a repeatable process, a good wash takes less than an hour.
This guide walks through everything: the tools, the technique, and why each step actually matters.
Recommended Resource
Your Home Wash Can't Reach Everything
You'll have the washing routine down once you read this article — but if you really want to protect your investment long-term, a professional undercoating or rustproofing treatment picks up where the garden hose leaves off. Think of your home wash routine as maintenance, and a P&L treatment as the foundation underneath it.
P&L Automotive in the Twin Cities has been doing this for over 40 years. They offer undercoating with a 10-year warranty, rustproofing, ceramic paint sealant, Paint Protection Film (PPF), and the Final Coat electromagnetic rust protection system.
View Protection Packages at P&L Automotive →Table of Contents
- Why Learning How to Wash Your Car at Home Beats the Drive-Through
- Before You Start: A Few Things That Matter
- The Process, Start to Finish
- Step 1: Start with the undercarriage and wheel wells
- Step 2: Clean the wheels with a dedicated cleaner
- Step 3: Pre-rinse the full exterior
- Step 4: Apply foam before you touch the car
- Step 5: The two-bucket wash
- Step 6: Final rinse from top to bottom
- Step 7: Dry immediately — don't let it air dry
- Step 8: Finish with a detail spray or quick wax
- Common Mistakes That Undo Good Work
- How Often Should You Wash?
- What You Need: Tools & Products for a Proper Home Wash
- The Setup Pays for Itself
- FAQs
Why Learning How to Wash Your Car at Home Beats the Drive-Through
The case for washing at home is actually pretty practical — this isn't just car-enthusiast overkill.
Automatic washes — even touchless ones — can't clean what they can't reach. The undercarriage barely gets rinsed. Door jambs are ignored entirely. Wheel wells get a brief spray and that's it. For cosmetic purposes that might be fine, but for protecting the car from corrosion — especially in a state where roads get salted from November through March — "barely rinsed" isn't enough.
The other issue is the brushes. Most drive-through washes that use physical contact are loaded with grit from the cars ahead of you. That grit gets dragged across your paint. Over years of car washes, this adds up to a finish that looks dull and hazy in direct sunlight. Touchless washes avoid this problem but compensate by using harsher chemicals to clean without contact — which strips wax and sealant faster than a proper hand wash.
A home wash with the right technique doesn't scratch. It doesn't miss the undercarriage. And it takes roughly the same amount of time once you have a routine.
Before You Start: A Few Things That Matter
Here's exactly how to wash your car at home, start to finish." Clean, direct, bridges the prep section to the process section naturally
Wash in the shade, not the sun
When body panels are hot from direct sunlight, soap and water dry much faster than you can rinse. That leaves water spots and dried soap residue that's harder to remove than the original dirt. Park in the shade, or wash in the early morning or evening.
Don't use dish soap
Dish soap is formulated to strip oils — which is exactly what you don't want on automotive paint. It removes wax, strips sealant, and can dry out rubber trim over time. Use a pH-balanced car wash shampoo. It cleans effectively without degrading the protective layers on your finish.
Let the car cool down first
If you've just driven, give it 20–30 minutes before washing. Hot metal and cold rinse water don't mix well — it can stress rubber seals around windows and doors, and causes soap to dry too quickly on the surface.
Get everything set up before you start
Once you begin, the goal is to work section by section and keep the car wet. It's much easier if your buckets are filled, your products are in reach, and your hose or pressure washer is already connected and ready.
The Process, Start to Finish
Step 1: Start with the undercarriage and wheel wells
This is the step most people skip, and it's the most important one for protecting the car long-term — especially after a Minnesota winter.
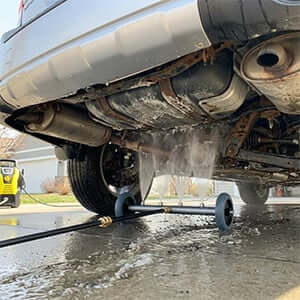
Wheels and the undercarriage collect the heaviest contamination: road salt, brake dust, mud, and road film that builds up in cavities where it never fully dries out. If you have a pressure washer, this is where it earns its money. Run it under the car with an undercarriage attachment, sweep it through the wheel wells, and blast the lower rocker panels. If you're working with just a hose, get as close as you can with a tight nozzle setting.
The goal here is to remove the bulk of heavy contamination before your hands — or your wash mitt — go anywhere near the paint. If you wash the body first and then knock salt and wheel dust onto panels you already cleaned, you're just starting over.
Step 2: Clean the wheels with a dedicated cleaner
Before touching the paint, give the wheels a proper wash using a separate bucket, separate brush, and a dedicated wheel cleaner. Wheel grime — particularly brake dust — is highly abrasive. If you use the same mitt on your wheels and then run it across your door panels, you're dragging abrasive material across your clear coat.
Spray on the wheel cleaner, let it dwell for a minute or two, scrub the face and barrel of each wheel, and rinse completely. Do all four wheels before moving on. Once the wheels are done, set that bucket aside.
Step 3: Pre-rinse the full exterior
With the undercarriage and wheels handled, rinse the entire exterior top to bottom before applying any soap. This pre-rinse lifts loose dirt, dust, and debris off the surface — so that when your mitt makes contact, it's not grinding grit against the paint.
Use a gentle nozzle setting or a wide-angle pressure washer tip — 25° to 40° is ideal for painted surfaces. Work from the roof down. Hit the panel gaps around the doors, the front grille, behind the side mirrors, and the lower body panels.
Step 4: Apply foam before you touch the car
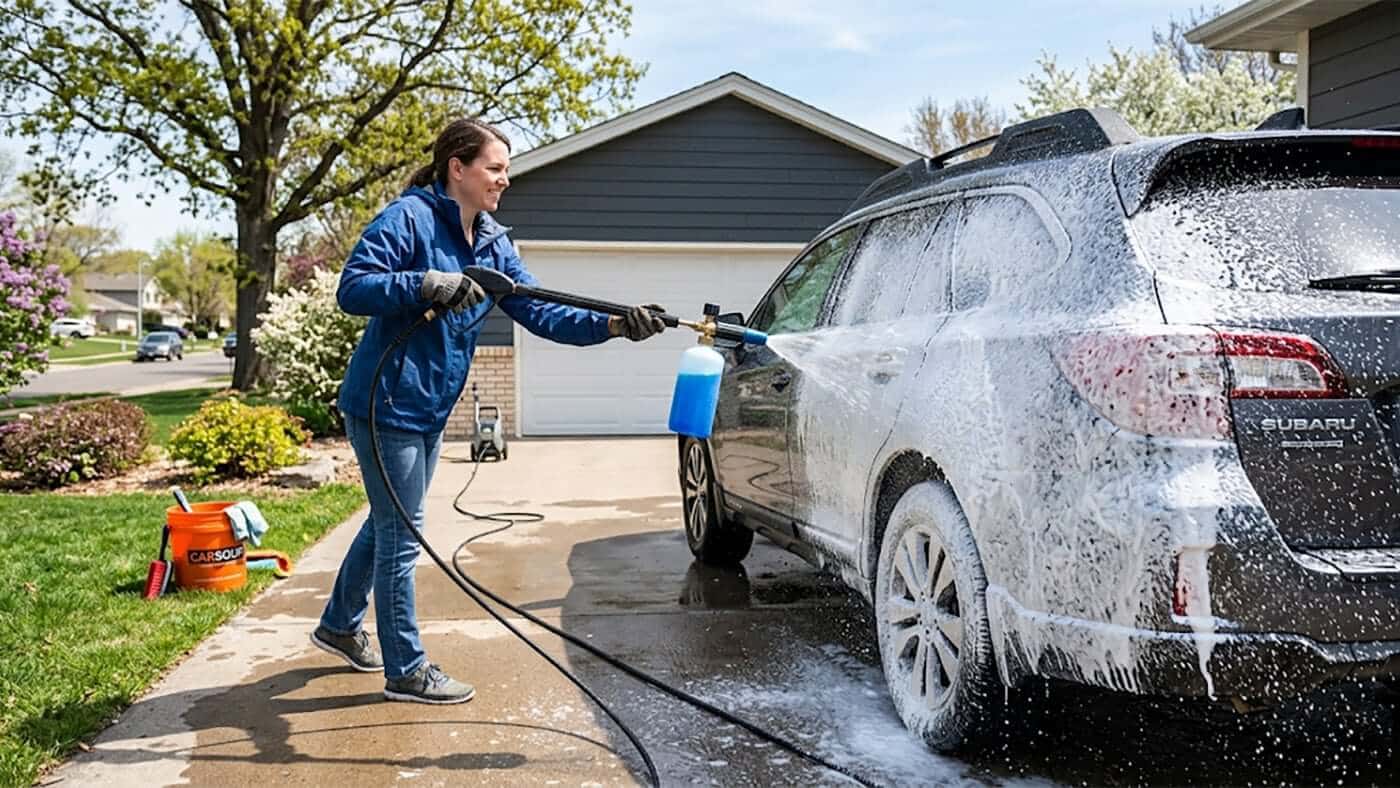
If you have a foam cannon or foam gun, now is when you use it. Fill it with your car wash soap at the recommended dilution, attach it to your pressure washer or garden hose, and cover the entire car in thick foam. Let it sit for two to three minutes.
This dwell time is what separates a thorough wash from a hurried one. The foam is doing chemical work — loosening and suspending dirt particles so that when your mitt makes contact, it's mostly just lifting clean material off the surface rather than scrubbing against it. The more the soap does, the less friction your mitt creates, and the less risk of swirl marks in the clear coat.
Step 5: The two-bucket wash
Set up two buckets: one with your shampoo solution, one with clean rinse water. A grit guard at the bottom of each is worth the few extra dollars — it traps grit below the surface so it doesn't get back onto your mitt when you rinse.
Load your chenille microfiber mitt with soapy water and start at the roof — then work down through the windows, hood, trunk, doors, and finally the lower body panels and bumpers. The lower the panel, the dirtier it is. Saving the grimiest areas for last means you're not dragging that contamination up onto cleaner surfaces.
Use straight overlapping horizontal strokes — never circles. Circular motions are how swirl marks happen. After every two or three panels, dunk the mitt in your rinse bucket, rub it against the grit guard to release trapped particles, wring it out, and reload with fresh soapy water. Rinse each section before moving on — don't let soap dry on a panel.
Step 6: Final rinse from top to bottom
Once every section has been washed, do a complete final rinse starting from the roof. Let the water sheet off rather than focusing a jet on any one spot for too long. Pay attention to door jambs, panel gaps, and the area under the hood lip — soap hides in these spots and dries there if you rush the rinse.
Step 7: Dry immediately — don't let it air dry
Air drying leaves water spots. Even relatively clean water contains dissolved minerals that stay behind as the water evaporates. Dry with a large, clean microfiber drying towel — blot and drag, don't press hard and scrub.
If you have a leaf blower or cordless air blower, use it first to push water out of panel gaps, door handles, mirror housings, and trim edges. This gets the pooled water out before you wipe, saving time and preventing drips from reappearing on panels you've already dried.
Step 8: Finish with a detail spray or quick wax
Once the car is dry, a quick pass with a spray detailer or waterless wash product adds a light protective layer and brings out the gloss. If you're doing a more thorough spring detail, this is also the time to apply a carnauba wax or paint sealant — always on a clean, dry surface, working one section at a time.
Common Mistakes That Undo Good Work
Using a regular sponge. A household sponge has a flat surface that traps grit against the paint. A chenille microfiber mitt has long, soft fibers that lift dirt away. This isn't a minor distinction — it's the difference between a wash that protects your finish and one that slowly damages it.
Skipping the undercarriage because you can't see it. Out of sight, out of mind is exactly how rust damage accumulates unnoticed. The undercarriage is the highest-priority area for salt removal, not the lowest.
Using the same tools on wheels and paint. Brake dust is abrasive. Keep your wheel brushes and wheel bucket separate from your paint tools, always.
Washing in the sun or on a hot car. Soap dries too fast, water spots form, and you end up chasing a mess that shouldn't have happened. Shade and a cool surface make every step easier.
How Often Should You Wash?
For most daily drivers, washing every two to three weeks is a reasonable baseline. That increases during winter — every one to two weeks through heavy salt season is worth the effort for anyone who cares about keeping corrosion at bay.
The more useful trigger is what you can see. If there's visible road film, salt haze, or grime buildup on the lower panels and wheel wells, don't wait for a scheduled wash day. After a significant snowstorm or heavy road-salting event, a quick undercarriage rinse within 48 hours is more valuable than a full wash a week later.
What You Need: Tools & Products for a Proper Home Wash
You don't need a garage full of professional equipment. But the difference between a good wash and a great one comes down to having the right tools for each part of the job. Here's what's actually worth buying — organized by what it's used for.
As an Amazon Associate, CarSoup earns from qualifying purchases made through the links below.
Pressure Washers & Undercarriage Attachments
A garden hose doesn't have the pressure to break up dried salt deposits — especially under the car where they've been baking on all winter. An electric pressure washer paired with an undercarriage attachment is the single most effective upgrade you can make to your home wash setup. We've listed two pressure washer options: a compact, car-focused pick for budget-conscious buyers, and a higher-powered unit that gets the most out of the undercarriage cleaner.
Electric Pressure Washer — Compact
Westinghouse ePX3100v — 2100 PSI
The most compact and portable option here — 18 lbs with a built-in carry handle, and a foam cannon included right out of the box. At 1,800 rated PSI it's solidly capable for full car washing, interior panel rinsing, and general undercarriage cleaning. Total Stop System shuts the pump off when you're not spraying to extend motor life. A great value under $150. Uses standard 1/4" quick connect fittings.
Best for: Buyers who want an affordable all-in-one car washing setup. Foam cannon included means no extra purchase needed. Handles undercarriage work on passenger cars well; the Greenworks below delivers more power for the undercarriage attachment.
Electric Pressure Washer — High Power
Greenworks GPW3000 Pro — 3000 PSI
The unit to buy if you want to get the most out of the undercarriage cleaner. PWMA-certified 3,000 PSI — verified by an independent testing authority, not just a marketing claim. The TruBrushless motor automatically adjusts pressure and flow based on which nozzle you're using. Backed by a 10-year motor warranty. Named "best overall" by Bob Vila and consistently top-rated across electric pressure washer roundups. Rugged steel wheelbarrow frame, 1-gallon soap tank, 25-ft kink-resistant hose. Compatible with M22 undercarriage cleaner and foam cannon fittings.
Best for: Anyone with a truck, SUV, or a vehicle with multiple Minnesota winters on it. More of an investment (~$350–400) but built to last a decade and handles driveways, siding, and decks just as well as the car.
Undercarriage Attachment
RIDGE WASHER 16" Undercarriage Cleaner
Connect this to your pressure washer gun via the included extension wand, then roll it under the car on its caster wheels — no crawling required. Four nozzles blast upward across a 16" swath, covering the full undercarriage in a few slow passes. Snaps onto either pressure washer above via quick connect. One of the most consistently well-reviewed undercarriage attachments on Amazon.
Best paired with the Greenworks (2,500+ PSI) for maximum cleaning effect. Works on the Westinghouse too, and is still effective for standard passenger car undercarriage cleaning.
Undercarriage Attachment — Upgrade Pick
Tool Daily 2-in-1 Undercarriage Cleaner + Foam Cannon
If you already own a pressure washer and want one attachment that does everything, this is it. Combines the undercarriage cleaner with a built-in 1-liter foam cannon — blast the undercarriage, flip the mode, foam the body panels, all with the same tool. Five operating modes, doubles as a flat surface cleaner for driveways. Named a top pick by Family Handyman.
View on Amazon →🛠 How to use these together: a quick-start sequence
- Connect the undercarriage attachment to your pressure washer gun via the extension wands
- Slide it under the car from the front, working back toward the rear
- Make 2–3 slow passes front-to-back, then side-to-side — extra time on wheel wells and frame rails
- Swap to the foam cannon; apply soap to the full exterior and let it dwell 2–3 minutes
- Rinse with the 25° or 40° nozzle from top to bottom
- Final undercarriage rinse to flush loosened debris
Washing Essentials
The bucket wash portion — soaps, mitts, and a starter kit for anyone building out their setup from scratch.
Car Wash Soap
Meguiar's Gold Class Car Wash — 64 oz
The most-reviewed car wash soap on Amazon. pH-balanced, safe on clear coats and waxes, produces thick foam that lifts salt and road grime without stripping existing protection. Works in a bucket or foam cannon.
View on Amazon →Car Wash Soap — Foam Cannon Pick
Chemical Guys Mr. Pink Wash Soap — 64 oz
The go-to for foam cannon use — produces thick suds that cling to vertical panels and dwell long enough to dissolve grime before you touch the car. pH-neutral and safe for ceramic and sealant-coated finishes.
View on Amazon →Wash Mitt
AIDEA Chenille Microfiber Wash Mitt — 2-Pack
Chenille microfiber is far safer on paint than a sponge — the fibers trap grit away from the surface instead of dragging it across your clear coat. A two-pack means you always have a clean one ready.
View on Amazon →All-in-One Starter Kit
Chemical Guys Wash Kit with Bucket, Soap & Mitt
If you're building a wash setup from scratch, this covers everything in one order: grit-guard bucket, car wash soap, wheel cleaner, interior cleaner, and a wash mitt. Best value for anyone who doesn't already own these basics.
View on Amazon →💡 Pro tip: The two-bucket method
Use one bucket for soapy wash water and a second with clean rinse water. After every few panels, rinse your mitt in the clean bucket before reloading with soap. This keeps grit out of your wash water so you're not dragging it back across the paint — one of the simplest habits that prevents swirl marks.
Wheels & Tires
Wheel Cleaner
Chemical Guys Diablo Wheel Cleaner — 2-Pack
Wheels take the worst salt and brake dust buildup over winter. Diablo is a spray-on formula safe on all wheel finishes — alloy, chrome, or painted — that cuts through grime without scrubbing. Spray, dwell, rinse.
View on Amazon →Drying & Finishing
Between-Wash Spray
Meguiar's Ultimate Waterless Wash & Wax — 24 oz
For quick cleanups between full washes — spray, wipe with a microfiber cloth, done. Lays down a thin wax layer as you clean. Handy to keep in the garage for a fast touchup after a salty commute.
View on Amazon →Paint Touch-Up & Scratch Repair
Surface Scratch Repair
Meguiar's Quik Scratch Eraser Kit
A drill-powered kit that removes light surface scratches, scuffs, and water spots in minutes. Use it before waxing — clean up blemishes first, then seal everything. Works on clear coat finishes.
View on Amazon →The Setup Pays for Itself
Once you know how to wash your car at home properly, every wash costs a few dollars in product and an hour of your time. All you need is a pressure washer, an undercarriage attachment, quality soap, and a few microfiber mitts. Once you have the DIY kit, you'll get a result that's genuinely better than what a drive-through produces.
For anyone buying a used car in Minnesota, this is also useful context: a car that's been regularly washed at home — undercarriage included — holds up significantly better than one that hasn't. When you're evaluating a used vehicle, check under the car. The undercarriage tells you a lot about how the car was treated.
If you're shopping for your next vehicle, browse current listings on CarSoup — and when you find something worth taking care of, you'll know exactly how.
- Read our article about how to prevent rust on your car.
FAQs
Is washing your car at home actually better than an automatic car wash?
For most people, yes — especially for thoroughness and paint safety. Automatic car washes can't effectively clean the undercarriage, door jambs, or wheel wells. Touchless washes use harsh detergents; touch washes with brushes can deposit grit from previous cars onto your paint. A proper home wash gets more complete coverage with less risk to your finish. The trade-off is time — a good home wash takes 45 minutes to an hour.
How often should I wash my car?
Every two to three weeks is a solid baseline for a daily driver. Through salt season, every one to two weeks is worth the effort. The more practical trigger is what you can see — if there's visible road film, salt haze, or grime on the lower panels, don't wait for a scheduled wash day. After heavy salting events, a quick undercarriage rinse within 48 hours is more valuable than a full wash a week later.
Can I use dish soap to wash my car?
It works in a pinch but isn't a good habit. Dish soap is designed to strip oils — which strips the wax and sealant protecting your paint. Regular use degrades your finish faster than normal weathering, leaving the clear coat more exposed to UV damage and oxidation. Use a dedicated pH-balanced car wash shampoo.
What PSI should I use on a pressure washer for car washing?
For body panels, 1,200 to 2,000 PSI with a 25° or 40° nozzle held at least 12–18 inches from the surface is the safe range. For the undercarriage and wheel wells, 2,500 PSI or higher is fine — you're cleaning unpainted metal, not clear coat. Never use a 0° or 15° nozzle directly on paint.
Do I really need two buckets?
Yes, and it makes a bigger difference than it sounds. One bucket holds soapy wash water, the other holds clean rinse water. After every few panels, rinse your mitt in the clean bucket before reloading with soap. This keeps the grit your mitt just picked up from going back into your wash water — and back onto the car. Skipping the second bucket is one of the most common ways swirl marks get introduced without the owner realizing it.
What is the correct order to wash a car?
Start with the undercarriage and wheel wells using a pressure washer, then clean the wheels with a dedicated bucket and brush, then pre-rinse the full exterior, apply foam and let it dwell, then do the two-bucket mitt wash working top to bottom — roof, glass, hood, trunk, doors, lower panels and bumpers last. Rinse each section as you go, then do a final full rinse and dry immediately.